|
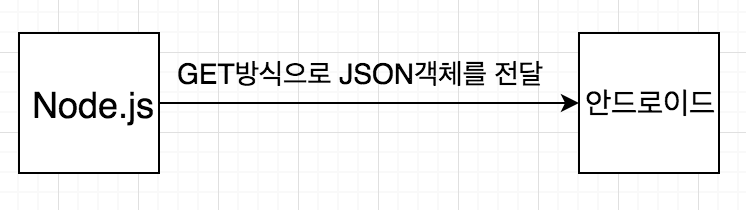
위와 같이 Node.js서버에서 보내는 JSON 객체를 GET방식으로 안드로이드에서 받는법을 알아봅시다.
노드 관련 책을 한번이라도 보셨다면 아래 파일은 쉽게 이해하실 수 있습니다.
app_and.js 파일
const express = require('express'); const app = express(); let users = [ { id: 1, name: 'alice' }, { id: 2, name: 'bek' }, { id: 3, name: 'chris' } ]
//단순히 http://localhost:3000/users로 접근하면 users라는 객체를 json으로 response하라는 의미입니다. app.get('/users', (req, res) => { console.log('who get in here/users'); res.json(users) });
app.listen(3000, () => { console.log('Example app listening on port 3000!'); });
실행은
node app_and.js
라고 치시면 됩니다
실행 화면
안드로이드 앱 소스 부분입니다.
먼저 인터넷을 사용하기 위한 퍼미션 세팅부분입니다.
AndroidManifest.xml
<?xml version="1.0" encoding="utf-8"?> package="com.example.kch.node_andtest">
<!-- 인터넷 연결 허용하는 퍼미션 --> <uses-permission android:name="android.permission.INTERNET" />
<application android:allowBackup="true" android:icon="@mipmap/ic_launcher" android:label="@string/app_name" android:roundIcon="@mipmap/ic_launcher_round" android:supportsRtl="true" android:theme="@style/AppTheme"> <activity android:name=".MainActivity"> <intent-filter> <action android:name="android.intent.action.MAIN" />
<category android:name="android.intent.category.LAUNCHER" /> </intent-filter> </activity> </application>
</manifest>
activity_main.xml
단순히 텍스트뷰와 버튼만 배치했습니다.
<?xml version="1.0" encoding="utf-8"?> android:layout_width="match_parent" android:layout_height="match_parent" tools:context="com.example.kch.node_andtest.MainActivity">
<LinearLayout android:layout_width="match_parent" android:layout_height="match_parent"> <TextView android:id="@+id/textView" android:layout_width="wrap_content" android:layout_height="wrap_content" android:text="Hello World!" app:layout_constraintBottom_toBottomOf="parent" app:layout_constraintLeft_toLeftOf="parent" app:layout_constraintRight_toRightOf="parent" app:layout_constraintTop_toTopOf="parent" /> <Button android:id="@+id/httpTest" android:layout_width="wrap_content" android:layout_height="wrap_content" />
</LinearLayout>
</android.support.constraint.ConstraintLayout>
MainActivity.java
package com.example.kch.node_andtest;
import android.os.AsyncTask; import android.support.v7.app.AppCompatActivity; import android.os.Bundle; import android.view.View; import android.widget.Button; import android.widget.TextView;
import org.json.JSONObject;
import java.io.BufferedReader; import java.io.IOException; import java.io.InputStream; import java.io.InputStreamReader;
public class MainActivity extends AppCompatActivity {
private TextView tvData; @Override protected void onCreate(Bundle savedInstanceState) { super.onCreate(savedInstanceState); setContentView(R.layout.activity_main);
tvData = (TextView)findViewById(R.id.textView); Button btn = (Button)findViewById(R.id.httpTest);
//버튼이 눌리면 아래 리스너가 수행된다. btn.setOnClickListener(new View.OnClickListener() { @Override public void onClick(View view) { //아래 링크를 파라미터를 넘겨준다는 의미. } });
}
public class JSONTask extends AsyncTask<String, String, String>{
@Override protected String doInBackground(String... urls) { try { //JSONObject를 만들고 key value 형식으로 값을 저장해준다. JSONObject jsonObject = new JSONObject(); jsonObject.accumulate("user_id", "androidTest"); jsonObject.accumulate("name", "yun");
HttpURLConnection con = null; BufferedReader reader = null;
try{ URL url = new URL(urls[0]);//url을 가져온다. con = (HttpURLConnection) url.openConnection(); con.connect();//연결 수행
//입력 스트림 생성 InputStream stream = con.getInputStream();
//속도를 향상시키고 부하를 줄이기 위한 버퍼를 선언한다. reader = new BufferedReader(new InputStreamReader(stream));
//실제 데이터를 받는곳 StringBuffer buffer = new StringBuffer();
//line별 스트링을 받기 위한 temp 변수 String line = "";
//아래라인은 실제 reader에서 데이터를 가져오는 부분이다. 즉 node.js서버로부터 데이터를 가져온다. while((line = reader.readLine()) != null){ buffer.append(line); }
//다 가져오면 String 형변환을 수행한다. 이유는 protected String doInBackground(String... urls) 니까 return buffer.toString();
//아래는 예외처리 부분이다. } catch (MalformedURLException e){ e.printStackTrace(); } catch (IOException e) { e.printStackTrace(); } finally { //종료가 되면 disconnect메소드를 호출한다. if(con != null){ con.disconnect(); } try { //버퍼를 닫아준다. if(reader != null){ reader.close(); } } catch (IOException e) { e.printStackTrace(); } }//finally 부분 } catch (Exception e) { e.printStackTrace(); }
return null; }
//doInBackground메소드가 끝나면 여기로 와서 텍스트뷰의 값을 바꿔준다. @Override protected void onPostExecute(String result) { super.onPostExecute(result); tvData.setText(result); }
} }
모두 작성 후 스마트폰에서 테더링을 킨후 노트북을 와이파이에 연결시킵니다.(즉 같은 네트워크여야됨)
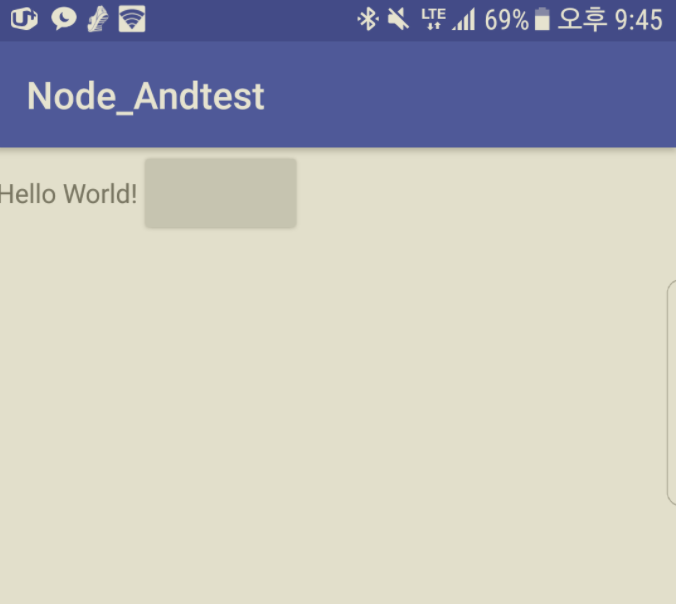
실행 화면
버튼을 누르기 전
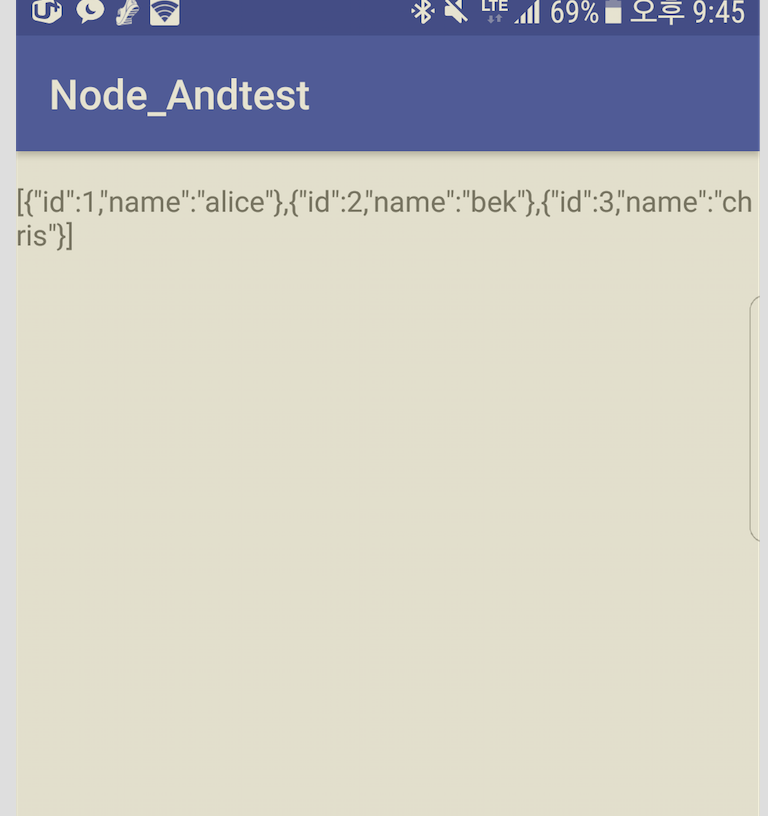
버튼을 누르면 다음과 같이 노드 서버로부터 데이터를 잘 받았음을 알 수 있습니다.
|